This screen is where you will most probably spend most of your time. As the concepts of grouping are quite in depth, I will not cover it here, but you can follow it via the following link Groups in More Detail Here I want to concentrate more on the workings of the layout window.
To speed things up, you can enter in the group defaults that will be used on the groups that are created. These defaults can be changed as required before the next batch is entered. You also have the 'Options - Quick Group Label' menu option which will provide a default label for the group based on the subject and class name.
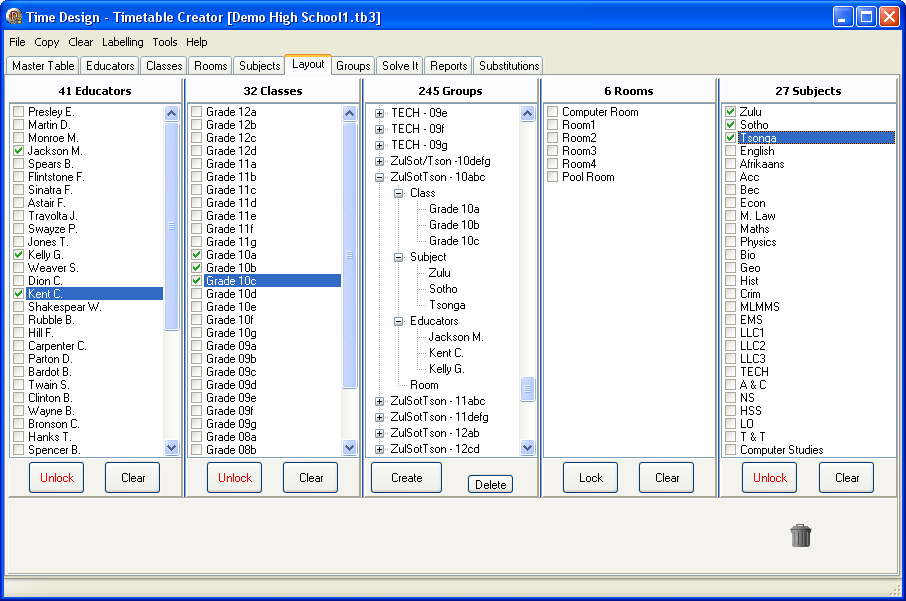
To remove a group or an educator, or class, or room, or subject from a group, select it and drag it to the trashcan in the bottom right. You also have the option of pressing the 'Delete' key or clicking the 'Delete' button. You can selected multiple items at a time with 'Ctrl' and Mouse Click or a Range of items by selecting the first item, holding down the 'Shift' key then click on the last item.
To create a Group, place a check next to the Educators, Classes, Rooms, and Subjects that you require, then click the 'Create' Button. To create a series of groups where possibly just the Class may change, click the 'Lock' button in the appropriate columns except for the Class column. You can then check the appropriate entities in each column and finally click the 'Create' button. All the columns that were Locked, will remain checked and the checks in the other columns will be cleared.
To add an educator, class, room or subject to an existing group, simply select the entity and Drag and Drop it onto the existing group.